
Wire Rope Socketing Training Course in Navi Mumbai, India
Wire rope end termination is a safety-critical task on every offshore vessel, crane deck and lifting operation. Done incorrectly, it can lead to catastrophic socket failure — with wire pulling clean out of the socket under load. Elite Offshore Academy’s Wire Rope Socketing (WRS) course in Kharghar, Navi Mumbai gives offshore personnel the practical skills and legal awareness to perform resin socketing to industry standards, every time.
Our 1-day, hands-on course covers the full 11-step socketing process — from measuring the socket bowl and brooming wire rope ends, through resin mixing and pouring, to proof load testing per ASME B30.9. You will leave with a certificate and the confidence to execute wire rope end terminations safely and correctly on board.
What Is Wire Rope Socketing?
Wire rope socketing is the process of permanently terminating a wire rope by embedding the broomed-out rope end into a conical socket filled with a resin compound. When correctly executed, a resin socket provides 100% efficiency relative to the breaking strength of the wire rope — making it the strongest and most reliable wire rope end termination method available.
Wire rope socketing is required wherever wire ropes are used in lifting, mooring, crane operations or rigging on offshore platforms, vessels and industrial sites. The method is governed by the Lifting Operations and Lifting Equipment Regulations (LOLER) and the Provision and Use of Work Equipment Regulations (PUWER) in the UK, and by equivalent international standards including ASME B30.9.
Who Should Attend?
This Wire Rope Socketing course is essential for anyone responsible for wire rope end termination in offshore, marine or industrial environments. It is specifically designed for:
- Offshore contract workers handling wire ropes on platforms and vessels
- Deck Foremen managing rigging and lifting operations on board
- Crane Operators who perform or oversee wire rope maintenance and replacement
- Fitters and Maintenance Technicians working with lifting equipment
- Safety Officers and HSE Supervisors responsible for lifting equipment compliance
- Maintenance Supervisors in oil & gas, marine and industrial facilities
- Anyone required to comply with LOLER / PUWER regulations for wire rope terminations
What You Will Learn — Course Content
This course combines regulatory awareness with step-by-step practical socketing skills. Topics covered include:
- Legal framework: Health & Safety at Work Act, PUWER (Provision and Use of Work Equipment Regulations) and LOLER (Lifting Operations and Lifting Equipment Regulations) — responsibilities and compliance requirements
- Socketing applications: an explanation of relevant socketing applications, factors influencing socket choice, and socket selection criteria
- Socketing methods and procedures: preparation, measurements, serving and seizure wire application
- Resin mixing and pouring: two-component resin chemistry, mixing ratios, colour uniformity checks, pot life and curing times
- Safe NORM work procedures including contamination control during rope cleaning with solvents
- Brooming technique: opening wire strands to a 60-degree included angle using a marlin spike, removal of plastic coatings and fibre cores
- Socket alignment: ensuring rope and socket axes are co-axial, wire ends flush with top of socket bowl
- Socket sealing: application of socketing putty and electrical tape to prevent resin leakage
- Post-cure re-lubrication of wire rope
- Proof load testing: testing assemblies to 2× safe working load (SWL) per ASME B30.9 before putting into service
- Common causes of socket failure and how to prevent them
- Ongoing practical socketing assessment with instructor feedback
Steps of Wire Rope Socketing Process
Delegates complete all 11 steps under instructor supervision during the practical session: Wire Rope Socketing
Step 1 – Measure Socket Bowl
To determine where to apply seizing wire, measure socket from bottom of socket to the top of the bowl.
The end of the rope should be long enough so the ends of the wires after being broomed will be at the top of the socket bowl.
Step 2 – Slide Socket onto Rope
Slide the socket into the rope about a meter down so that sufficient length of wire is to work with.
Step 3 – Apply Seizing Wire at Base of Socket
Apply the seizing wire one (1) socket bowl length from the rope end and continue to apply, working away from the rope end. The seizing length must be at least two (2) rope diameters long.
Plastic coated, plastic filled wire ropes and fiber cored ropes must have all plastic material and nonmetallic materials removed from within the broomed area. Only use soft annealed iron wire for seizing wire.
Step 4 – Broom Wire Rope End
Using a marlin spike, begin to open the strands. Using a short piece of pipe, bend each strand open to a 60 degree included angle.
Open strands evenly. Should the rope have a plastic coated core, remove all plastic coating. For fiber core ropes, cut out the fiber core.
Step 5 – Clean Wire Rope End
Swish the broomed-out rope end in a solvent and make sure that the wires are clean from the very bottom of the broom up to the seizing band. After cleaning, place the broomed-out rope end pointing downward. Allowing it to remain inverted until all solvent has evaporated and the wires are dry. Solvent should never be permitted to remain on the rope or on the serving band since it will run down the wires when the rope is turned upright.
Step 6 – Pull Broom Into Socket Bowl
Pull the socket up over the rope broom. Make sure the rope wires are uniformly spaced in the socket bowl, with the wire ends even with the top edge of the bowl and the axis of the rope and the axis of the socket are aligned.
The top of the seizing should be even with the bottom of the socket. Be sure not to allow any broomed wire to extend below the base of the socket.
Step 7 – Seal Bottom of Socket
Wrap the bottom of the socket with socketing putty, being sure to press the putty into the valleys between the strands.
To provide a greater seal, wrap electrical tape over the socketing putty.
Step 8 – Mix Resin
Knead resin pouch for approximately 30 seconds prior to tearing open in order to mix the resin/silica thoroughly. Tear open the resin pouch and squeeze contents into mixing container provided. If the kit contains more than one resin pouch, be sure to pour all the resin into the mixing container before adding hardener pouches.
Tear open the hardener pouch and squeeze contents into resin. With a mixing paddle, thoroughly mix resin and hardener for at least 60 Seconds
until color is uniform, be sure to scrape bottom and sides of mixing vessel to ensure complete mixing.
Step 9 – Pour Resin Mixture into Socket
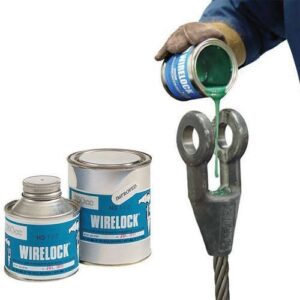
After mixing resin and hardener, immediately prepare to pour it into the socket. Position the provided “Fast Funnel” so that the resin will discharge out of the funnel into the socket bowl along the socket wall. This will help the resin reach the bottom of the bowl and reduce the chance of trapping air.
Fill to the top edge of the socket bowl. As resin mixture penetrates down into the bowl, it may be required to add more resin to the socket bowl. Never add more resin to the bowl after resin has begun to gel and harden.
Allow resin to firmly gel prior to moving assembly. Prematurely moving the assembly could damage the resin before it hardens; therefore, reducing the efficiency of the termination. Wait 15 minutes after the resin has gelled before moving the assembly
Step 10 – Re-Lubricate Wire Rope
After the resin has cured, re-lubricate the wire rope to replace any lubricant that may have been removed during the cleaning process.
Step 11 – Proof Test Assembly
It is recommended to proof load the assembly to twice the safe working load prior to putting the assembly into service per ASME B30.9.
Why Choose Elite Offshore Academy?
Following are our advantage:
- ISO 9001 (ABS), ISO 21001 (TUV), ABS CMET and LISCR compliant — internationally accredited quality standards
- MLC 1.3 & 3.2 compliant — meeting maritime labour convention requirements
- True hands-on training: every delegate performs the full 11-step socketing process under instructor supervision
- Small batch sizes for focused, one-to-one feedback during practical sessions
- Experienced instructors with active offshore and crane operations backgrounds
- On-demand scheduling — book when your crew is available, ideal for corporate group bookings
- Conveniently located in Kharghar, Navi Mumbai — easily accessible from across the Mumbai Metropolitan Region
- Competitive fee of INR 15,000 with no hidden charges
- Internationally recognised certificate accepted by offshore, marine and industrial employers
- Overseas students welcome — dedicated support available
Frequently Asked Questions (FAQs)
What is resin wire rope socketing and why is it important?
Resin wire rope socketing is a method of permanently terminating a wire rope by brooming the rope end and embedding it in a conical socket filled with a two-part epoxy resin compound. When done correctly, the termination achieves 100% of the wire rope’s breaking strength — making it the most efficient end termination method. It is critical for safe lifting, mooring and rigging operations on offshore platforms and vessels.
Who is required to attend wire rope socketing training?
Under LOLER (Lifting Operations and Lifting Equipment Regulations) and PUWER (Provision and Use of Work Equipment Regulations), employers must ensure that lifting equipment is maintained and operated by competent persons. Anyone performing or supervising wire rope end terminations — including crane operators, deck foremen, fitters and maintenance supervisors — should hold formal socketing training.
How long does resin take to cure in a wire rope socket?
The gel time after pouring mixed resin is approximately 15 minutes — the assembly must not be moved during this period. Full cure depends on the specific resin product used and ambient temperature; the instructor covers cure times and environmental factors during the course.
What is a proof load test for wire rope socketing?
A proof load test involves applying a load of 2× the safe working load (SWL) to a completed socket assembly before putting it into service, as required by ASME B30.9. This verifies the integrity of the resin termination and confirms the socket will perform safely under operational loads.
Do you need to bring any equipment to the course?
No — all tools, materials and equipment are provided by Elite Offshore Academy. The practical session uses industry-standard socketing kits, solvents, resin systems and seizing wire. Delegates are welcome to bring questions from their specific operational context.
How much does the Wire Rope Socketing course cost and when does it run?
The course costs INR 15,000 and runs for one day from 11:00 to 18:00 on demand. Contact us on 9699 27 2855 (call or WhatsApp) to book your seat or arrange a group booking for your crew.
Is the certificate recognised by offshore employers?
Yes. Elite Offshore Academy is ISO 9001 (ABS), ISO 21001 (TUV), ABS CMET and LISCR compliant. Our certificates are recognised by offshore, marine and industrial employers across India and internationally.
| Course | Fee INR | Duration | Course Timing | Date Commence | Remarks |
|---|---|---|---|---|---|
| WRS | 15,000 | 1 day | 11:00 – 18:00 | On Demand | Practical Session |